1. Why?
Ngrok is powerful and easy for starting. You can use it for single app development (publish dev environment, test API, test webhook from third-parties programs…) without problems.
The inconvenience comes from the limitations of Ngrok Free plan:
- You’ve been given a random public URL (https://abc.ngrok.io). It’s annoy to config your app URLs again each time you start Ngrok tunnel.
- Even when you leave the tunnel open to prevent restarting, the session only lasts to maximum of 8 hours. You’re forced to start again.
- There is a limit on number of connections per minute (~40).
- 1 process + 4 tunnel each process = maximum 4 sites at the same time.
Of course, you can upgrade to higher plan to eliminate the limits, but building your own system is a lot more fun 😄.
If you have a public address, how could you configure it the same way Ngrok did to publish your local dev site to the Internet?
2. Approach
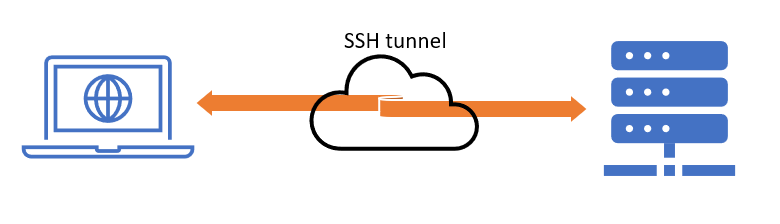
We will turn our public address to a kind of proxy, sits in the middle of the users and the internal webapp.
When user connects to the proxy, the proxy routes the traffic to internal webapp. The webapp in turn responses to user through the
proxy.
There is a technique that perfectly fit this need: SSH tunnel
.

3. System requirement
- A public address (IP only is enough).
- SSH is installed.
4. Implement
4.1. Setup SSH tunnel
Use this command to open an SSH tunnel from the remote host to localhost:
ssh -v -N -R [R_PORT]:localhost:[L_PORT] [SSH_user]@[R_ADDR]

-v: verbose mode, for debugging
-N: create SSH connection without shell interaction
In this setup, all traffic arrive remote address at port [R_PORT] are routed to localhost:[L_PORT] instead.
Of course, you need provide SSH credentials to authenticate with the server (remote host).
At the result, when open [R_ADDR]:[R_PORT], you will see the internal webapp at localhost:[L_PORT].
It’s simple enough. The real problems come afterward:
- Most webhook services require our endpoint is under SSL (https).
Usually, SSL is served under specific port of webserver (mostly 443).
While that port is being listened by webserver, SSH cannot use it to open a tunnel. - In local environment, if there are many virtualhosts, we cannot choose which virtualhost SSH should tunnel to.
However, there will always be ways. Again, we utilize the power of webserver proxy mode to solve both problems.
Here is the advanced setup after done:

4.2. Map to correct virtual host in localhost
On localhost, create internal proxy to map from the listening SSH tunnel port to expected local virtualhost.
4.3. Listen on SSL endpoint
On remote server, set up an SSL endpoint (LetsEncrypt - Certbot can help).
Then, create internal proxy from that SSL endpoint to the listening SSH tunnel port.
Code example
Remote: proxy from SSL endpoint to port
Route all traffic from example.com to local port 3000.
# Apache
<IfModule mod_ssl.c>
<VirtualHost example.com:443>
    ServerName example.com
    SSLEngine on
    SSLCertificateFile      /path
    SSLCertificateKeyFile   /path
    ProxyPass        / http://127.0.0.1:3000/
    ProxyPassReverse / http://127.0.0.1:3000/
</VirtualHost>
</IfModule>

# Nginx
server {
    listen 443 ssl;
    ssl_certificate     /path;
    ssl_certificate_key /path;
    server_name example.com
    location / {
        proxy_pass http://127.0.0.1:3000;
    }
}
Local: proxy from port to expected virtualhost
Route all traffic from port 3000 to example.local
# Apache
Listen 3000
<VirtualHost *:3000>
    ProxyPass        / http://example.local/
    ProxyPassReverse / http://example.local/
</VirtualHost>

# Nginx
server {
    listen 3000;
    location / {
        proxy_pass http://example.local;
    }
}
Create SSH tunnel between remote and local
On local, open SSH tunnel to remote, connect remote port 3000 and local port 3000
ssh -NR 3000:127.0.0.1:3000 user@remote_address